Sunday, April 3, 2016

With Deepest Sympathy

Happy Sunday, friends!  We just got 2-3" of snow last night and lots of gusty wind this morning means I'm probably going to have a cozy crafty day indoors.  :)  I'm going to try and catch up on the hundreds of cards I've made during my blog absence starting with the most recent and going backwards.  I made this card a couple of weeks ago for one of my husband's co-workers whose husband committed suicide.  :(  


I used some Spring Moss card stock by Papertrey Ink for the card base and then layered scraps from My Mind's Eye (plaid kraft) and Stampin' Up! (yellow floral) on top.  I inked up an office tag for a distressed look and added some SUPER OLD stickers from K & Co.  (Hooray for finishing that sheet of stickers!)  The greeting is from Impression Obsession's Sympathy Sentiments clear stamp set.

I always find sympathy cards to be a challenge, but I thought this turned out ok with soft colors and images from nature.  I hope you like my card and have a great second half of your weekend!  Thanks for stopping by!

Suzanne :O )

Saturday, March 26, 2016

TCP Tuesday #310

Hi friends!  It's been such a long while but I'm going to jump right back in to blogging with both feet.  The other day I had a burst of creative energy and was looking for a challenge to get my juices flowing... enter the bunny challenge over at The Cat's Pajama's.  I pulled out an older stamp set called "A Girl and Her Cake" and my Distress markers and got to work watercoloing.  On my desk I had twelve strips of leftover patterned papers from Heidi Swapp's September Skies collection.  I didn't quite know how to get ALL of the scraps off my desk, and then the lightbulb went off!  I used an old technique of punching circles to make a textured background.  Wouldn't you know that I used every single circle with just minor scraps going in the garbage?!  I LOVE when that happens.  I hate to waste anything!  lol  So here's my card:  


I matted the image on some old Bazzill polka dot navy cardstock cut out with a Spellbinders die.  The card measures 5.5 x 5.5 and I pulled out an old coral envelope I had in my stash that coordinated quite well with the patterned papers.  A match made in heaven:


I hope you like my card and that I can get back to posting regularly.  I have SO many cards over the past few years that I haven't posted, but I'm not going to pressure myself to "catch up."  I do enjoy having a log of my work though, it's so fun to look back and see how far I've come on this creative journey!  Thanks for stopping by, friends!

-Suzanne :O )


Sunday, May 18, 2014

Thoughts of You

Hi friends!  I know I still haven't done my "what happened in 2013" post, but I'm back today to share a quick card I made for my friend Lauren whose mother just passed away last week.  I think things are going to be tough for her for a while, so I wanted to send a card to let her know I'm still thinking of her.  I used this week's Poppy Sketches challenge to get me started:


I don't have any Cas-ual Friday stamps, but I didn't do a ton of stamping on my card anyway.  I pulled out all of my mint and peach scraps and started the card off by cutting varying widths of peach cardstock.  I used two shades for interest and made stripes on one end of the card.  Then I cut a long strip of Navajo Bazzill cardstock and cut it into a flag shape.  It seemed a bit too plain for me so I added some washi tape from Target and a bit of twine from We R Memory Keepers.  I clear embossed the sentiment and butterflies, all from Paper Smooches.  I added the Thickers to my banner and popped the butterflies up with foam tape.  For me this is a pretty simple card since I didn't use any patterned paper, but I wanted it to appear soothing.  :)


I hope you enjoy, thanks for stopping by!

-Suzanne :O ) 

Friday, May 9, 2014

Woo-hoo!

Hi friends!  I'm back to share another card for the Poppy Sketches challenge!  Here's the most current sketch:


The sponsor for this challenge is Lawn Fawn, so I pulled out of my four stamps sets and puzzled for a while over the X in the middle of the sketch.  Then it occurred to me that I could overlap some logs and I went to work creating a scene with my Critters in the Forrest stamp set.  


I did a lot of paper piecing with scraps and then stamped the "woo-hoo"s in Versamark and heat embossed it with white embossing powder.  I did the same thing with the bottom sentiment and added a couple of brown gems over the book plate die-cut.  I also decided to get crazy and stamp the envelope, too.  :)


I hope you guys enjoy my card, thanks so much for stopping by!

-Suzanne :O )


Saturday, April 26, 2014

I'm back!

WHOWWWWWW!  That's me blowing the dust off my blog!  lol  I haven't been around for over a year, with good reason.  A LOT of good things happened last year, but I'll save that for another post because there are tons of pictures I want to share.  :)

I was looking around at some blogs the other day and spent some time looking at Lori Tecler's blog.  She always has a TON of cards to share and I love how simple her style is.  While looking at her posts, I came across one for Poppy Sketches, which appears to be a new sketch/color combo blog.  I thought I'd ease back into blogging by participating with their second sketch:


I have quite a few cards to make for May/June birthdays, so I used the sketch to make my brother's birthday card.  I pulled out my Stampendous stamps since they're sponsoring this time.  Here's my take, with the Changito Bday stamp set:


I started off by die-cutting the red polaroid frame with my Papertrey Ink die.  I stamped the image on my X-Press It cardstock and colored it with my Copics.  I haven't used my Copics in quite a while, so hopefully this doesn't look too awful!  :)  I cut the cardstock to fit behind the frame and then turned my attention to the gray cardstock from Bazzill.  It looked too plain but I didn't want to add patterned paper, so I took some of the small images from the stamp set and used my Versamark ink pad to clear emboss a pattern on the background.  I think it's the perfect solution to adding interest but not color.  :)


Instead of a literal circular element, I chose to tie a knot with some teal ribbon and add a cupcake charm (which I've had for ages!) with some baker's twine.  Any time my mom gets a bakery box, she saves the twine for me.  Isn't she cute?  :)


Here's a close-up of the image.  That wraps up this card for me.  I hope you like it and I will be back very soon to share all the things that happened in 2013 since I last blogged.  I stopped blogging partly because I was busy and partly because I thought no one was even reading my posts, but I realized that this blog is for ME.  It's amazing to look back on my old posts and have a record not only of the cards I've made, but of my creative progress and the things that were happening in my life at the time.  Yes, this blog is mostly just crafty, but it is also part diary, so I need to keep it going for myself.  I can't wait to catch up and keep my blog current!  :D

-Suzanne :O )

Saturday, March 2, 2013

TCP Tuesday Challenge

Good morning, crafty friends!  Today I woke up and just felt like playing with my supplies.  I wanted to play along with this month's TCP Tuesday challenge to use one of their cut-ups or stamps in a new way.  I pulled out all of my stamps and my one cut-up die and thought and thought about what I could do.  I haven't used my rosette cut-up die much (mostly because I'm lazy) and then the lightbulb went off that I could just cut it as a scalloped circle and use it as a tree topper!  Off to work I went gathering the rest of my supplies and finally came up with this scene:


I used lots of paper scraps from My Mind's Eye Lime Twist (Life of the Party collection) and colored PJ and the clouds (from What a Blast) with my copics.  The pinwheel was paper pieced, but my only regret is using that blue houndstooth- it blends in with the background too much.  Anyway, the tree trunk is from Happy Camper and the sentiment is from Birthday Bunny
.

To finish off the card I added a red gem to the center of the pinwheel.  I'm not one to create scenes like this, but I *really* love it!  I wish I could live in a world with chevron grass and polka dot trees.  Sigh.  :)

I hope you like my card, thanks so much for stopping by!
-Suzanne :O )


Friday, March 1, 2013

Spread the Love!

Hi friends!  This week, Clear and Simple Stamps is hosting a fun linky party and I wanted to make sure I submitted a project!  The idea behind their challenge is to make a card or project inspired by your "blog crush."  

My crush is easily Kerry from www.kerryspapercrafts.com.  I stumbled across her blog a couple of years ago when I did a search for craft fair projects, and her blog was just chock full of them!  She has a really cute and fun style and had so many different items to sell.  She also makes video tutorials, which makes it really easy to borrow her ideas!  The thing I really admire about Kerry is that she doesn't seem to hoard product like I do.  LOL!  Her craft fair tables are always so attractive and enticing, and that makes me push myself to try and create items that people can't say no to.  LOVE her stuff!  :D

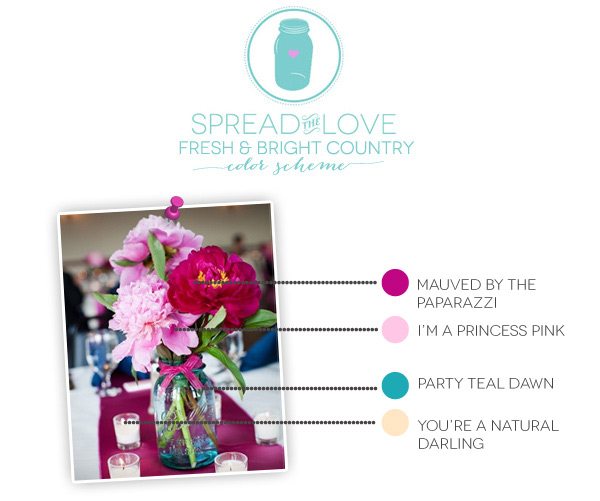
The other half of the C&SS challenge was to use one of their fun color schemes.   I chose to work with this one:


With the color scheme and Kerry's blog as inspiration, I decided to make a few fun sets of colorful clips:


They were really easy to make and came together pretty quickly!  I started off by covering some clothespins with patterned paper from My Mind's Eye (Lime Twist: Happy Go Lucky).  The part that takes the longest is sanding the paper to the clothespin, but that process really makes the clips look polished.  


Next I started working on the toppers, which is where my C&SS supplies came in really handy!  I used the largest die from Toppers and stamped it with the polka dots in Toppers Fillers.  The chocolate bunny outline and filler are from (retired) Easter Basket and Best Bunnies.  For the finishing touch, I die-cut some banners from Favor Flags and stamped the sentiment from Easter Basket.


Because I didn't have to do any coloring, all three toppers probably only took about 15 minutes to create.  LOVE when mass-producing goes quickly!  :D  I think the clear plastic bags I used are 3" x 4" and topper measures 1.5" x 3".  I also want to note how cheap the clothespins are- I get mine at the dollar store (36 in a pack)!  :)

I hope you enjoyed my craft-fair inspired project today!  If you're interested in linking up, you have until 9 a.m. tomorrow.  Visit Amber's blog for more details (and inspiration!).

Thanks for stopping by!
-Suzanne :O )


Related Posts Plugin for WordPress, Blogger...