Saturday, March 2, 2013

TCP Tuesday Challenge

Good morning, crafty friends!  Today I woke up and just felt like playing with my supplies.  I wanted to play along with this month's TCP Tuesday challenge to use one of their cut-ups or stamps in a new way.  I pulled out all of my stamps and my one cut-up die and thought and thought about what I could do.  I haven't used my rosette cut-up die much (mostly because I'm lazy) and then the lightbulb went off that I could just cut it as a scalloped circle and use it as a tree topper!  Off to work I went gathering the rest of my supplies and finally came up with this scene:


I used lots of paper scraps from My Mind's Eye Lime Twist (Life of the Party collection) and colored PJ and the clouds (from What a Blast) with my copics.  The pinwheel was paper pieced, but my only regret is using that blue houndstooth- it blends in with the background too much.  Anyway, the tree trunk is from Happy Camper and the sentiment is from Birthday Bunny
.

To finish off the card I added a red gem to the center of the pinwheel.  I'm not one to create scenes like this, but I *really* love it!  I wish I could live in a world with chevron grass and polka dot trees.  Sigh.  :)

I hope you like my card, thanks so much for stopping by!
-Suzanne :O )


Friday, March 1, 2013

Spread the Love!

Hi friends!  This week, Clear and Simple Stamps is hosting a fun linky party and I wanted to make sure I submitted a project!  The idea behind their challenge is to make a card or project inspired by your "blog crush."  

My crush is easily Kerry from www.kerryspapercrafts.com.  I stumbled across her blog a couple of years ago when I did a search for craft fair projects, and her blog was just chock full of them!  She has a really cute and fun style and had so many different items to sell.  She also makes video tutorials, which makes it really easy to borrow her ideas!  The thing I really admire about Kerry is that she doesn't seem to hoard product like I do.  LOL!  Her craft fair tables are always so attractive and enticing, and that makes me push myself to try and create items that people can't say no to.  LOVE her stuff!  :D

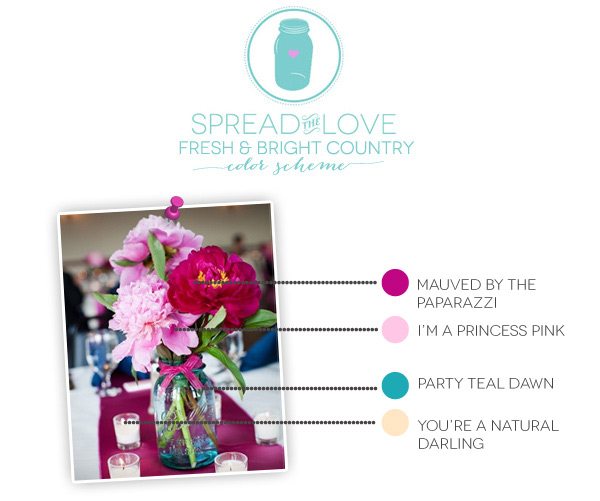
The other half of the C&SS challenge was to use one of their fun color schemes.   I chose to work with this one:


With the color scheme and Kerry's blog as inspiration, I decided to make a few fun sets of colorful clips:


They were really easy to make and came together pretty quickly!  I started off by covering some clothespins with patterned paper from My Mind's Eye (Lime Twist: Happy Go Lucky).  The part that takes the longest is sanding the paper to the clothespin, but that process really makes the clips look polished.  


Next I started working on the toppers, which is where my C&SS supplies came in really handy!  I used the largest die from Toppers and stamped it with the polka dots in Toppers Fillers.  The chocolate bunny outline and filler are from (retired) Easter Basket and Best Bunnies.  For the finishing touch, I die-cut some banners from Favor Flags and stamped the sentiment from Easter Basket.


Because I didn't have to do any coloring, all three toppers probably only took about 15 minutes to create.  LOVE when mass-producing goes quickly!  :D  I think the clear plastic bags I used are 3" x 4" and topper measures 1.5" x 3".  I also want to note how cheap the clothespins are- I get mine at the dollar store (36 in a pack)!  :)

I hope you enjoyed my craft-fair inspired project today!  If you're interested in linking up, you have until 9 a.m. tomorrow.  Visit Amber's blog for more details (and inspiration!).

Thanks for stopping by!
-Suzanne :O )


Sunday, February 24, 2013

Kiddie Valentines!


Hi friends!  I'm starting to get a little behind on my blogging again- ack!  Today I want to catch up a little and finish posting my Valentine's Day cards.  These are the valentines I made for my dad to give to his 3rd grade class.  A few years ago I had bought a package of SUPER cute die-cuts by K&Co, and of course hoarded them because they were too cute to use.  However, this is my dad's last year of teaching, so I figured it was now or never if I wanted to use them up.  You'll see later in the post that my dad has 24 students, but I had used one of the 24 die-cuts for Chris's valentine a few years ago, so I had to make my own die-cut.  ;)

I made 2 of each card; you can see all 12 designs below.  The die-cuts were rather large, so I cut my paper (single panel) to 5 1/2" x 6" and made my own envelopes with my new We R Memory Keepers Envelope Punch Board (LOVE this tool!).  


You can see that I scattered a lot of hearts and flowers and things all over the cards.  The die-cuts came with a ton of those small pieces and I wanted to finish them up, so they result is a very sprinkle-y card, but I think it's actually pretty cute.  And!- you know I love my puns!  LOL  So these cards were very simple to put together, but I'm totally in love with them.  :)

Okay, so I mentioned before that I had to make my own die-cut, because I only had one of the robots.  I scanned and printed the robot I had and added glitter to the knock-off version.  It didn't come out exaaactly the same, but I'm hoping the 9 year-old who got that card didn't notice.  ;)


Lastly, I want to show you what I did with the envelopes.  The envelope maker I just bought is super awesome.  It was only $20 and you can make up to 60 different-sized envelopes.  It's great for making wacky-sized cards like these.  It also helps you use up tons of patterned paper!  LOVE that!  :D  I tried to use 24 patterned papers that had an all-over design, so you wouldn't think one side of the envelope was upside-down.  


On the front of the envelope, I die-cut a circle and added a treat cup from Stampin' Up! filled with tiny erasers!  (I also wanted to finish up the treat cups!  LOL  I had had them for a few years and never knew what to do with them, so they went into my use-it-up pile.)  


I bought some pencils to go along with the erasers, and a tiny granola bar and some graham cracker Goldfish to finish off their treat bags.  I'm really sad that my dad is retiring; I've really loved making little crafty projects for his students.  It's always helped me use up a lot of product, and I love crafting with kids in mind.  I guess I'll just have to wait until I have kids and start crafting for their classmates!  ;)

Thanks so much for bearing with me through this long post today!  I hope you enjoyed my kiddie valentines and inspire you to use your treat cups for something other than candy!  :D

Thanks so much for stopping by!
-Suzanne :O )


Sunday, February 17, 2013

Valentine's Day 2013 Card Parade

Hi friends!  I'm a few days behind, but I wanted to share the rest of the Valentine's Day cards I made.  I'm still desperately trying to finish up all the bits and pieces I have in my stash- SO many images and embellishments are from swaps I did years ago, so I don't know the manufacturers.  I still have a TON of stuff left in my Valentine's Day pouch- it's amazing how much I've accumulated!  Anyway, I hope you enjoy my picture parade, thanks so much for stopping by!

-Suzanne :O )


Wednesday, February 6, 2013

Love isn't Purrrrfect


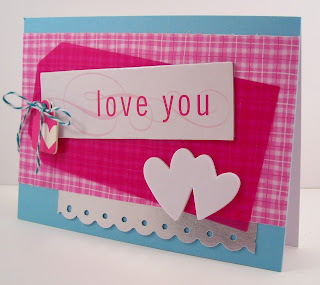
Hi friends!  Just popping in quickly before work to share these scrappy cards I made over the weekend.  I used lots of older products- images and heart banners were from swaps, the paper is DCWV and the heart border sticker is We R Memory Keepers.  I matted everything on Hawaiian Shores card stock (PTI) and dark grey card stock a friend gave to me (not sure who made it).  I hope you like these valentines, thanks for stopping by!

-Suzanne :O )


Saturday, February 2, 2013

Celebrating 30


Hi friends!  Today is my good friend Tamara's birthday!  She's the first of my high school friends to turn 30- luckily I don't have to think about that until September.  ;)  I just got some new goodies from Papertrey Ink, so I used my By the Numbers dies on some Vintage Cream card stock and taped some fun patterned paper from SEI behind the negative space.  I stamped "Celebrating" from Big Birthday Wishes around the border and adhered the whole piece to some Hawaiian Shores card stock with some foam tape.  Inside it says "amazing years."  

This is a more clean and simple look for me, but I really like how colorful the numbers are and that the "30" is the star of the show.  I hope you like it, thanks for stopping by!

-Suzanne :O )

PS-  I successfully made it through my new year's resolution to post every day in January!  That really made me feel good, and I'm excited to continue posting MUCH more frequently this year than I did last.  Thanks for continuing on this journey with me!

Thursday, January 31, 2013

happy home


Hi friends!  I am not one to scrapbook (mostly because I don't take many pictures) but I think I did alright with this layout!  In the picture are Chris's sister and her fiance, Victor.  They had a get together over the summer at their new apartment, so Chris and I gave them this framed layout as a housewarming present.  All supplies are by Echo Park from their Life is Good line.  I chose that collection because of all the house stickers ;)  

This picture is actually one that Brittany took and shared on facebook because she liked her gift so much!  She's very much into photographs, and I think she was really touched that I made something so personal for her.  :)

The paper supplies didn't cost very much, and the frame I got from Michaels for $6 (with my 40% off coupon, of course).  I would definitely make one of these again for a housewarming gift... it was really simple to make and a "wow" kind of gift.  I hope you like it too, thanks so much for stopping in!

-Suzanne :O )

Wednesday, January 30, 2013

Sweetheart


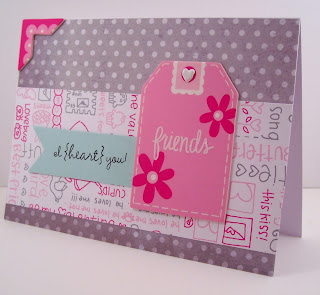
Hi friends!  Just popping in with another of my use-it-up Valentine's Day cards.  This one uses old patterned paper from Doodlebug, a sentiment from Joann's and some ribbon from American Crafts.  The gray heart was die-cut with my Nestabilities and the pink heart and rosebud embellishment were both from swaps.  

How are you coming with your Valentines?  I've done all of the cards for my friends and family- I just have to make a few more for my mom to send.  I also have to come up with gift packaging for my dad's class.  I bought graham crackers and granola bars for him to give out- I just want to come up with a cute way to package them.  :)

Hope you like today's card, thanks for stopping by!
-Suzanne :O )


Tuesday, January 29, 2013

A Gift for Grandpa


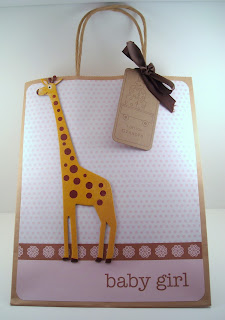
Hi friends!  Tomorrow at work we're having a grandpa shower for our school social worker who just had his first grandchild a couple of weeks ago.  I got him a picture frame and a book, so I thought it would be cute to package them in a handmade bag.  (I had a little trouble getting the bag in my light box, so please excuse the picture!)  I used an 8" x 10" bag and adhered a piece of DCWV patterned paper.  I added an old chipboard giraffe from Basic Grey and thought about adding more embellishments, but decided to make a tag to fill the space instead.


I die-cut the larger tag from Clear and Simple Stamps (Tags 1) and stamped a tag outline from Trendy Tags.  The wagon, stack of presents and sentiment were stamped from Cart Pals: Baby.  I wanted to keep everything from getting too frilly because I'm giving it to an adult male (but this was tricky because the baby is a girl!  LOL).


Of course I needed to make a card to go with the gift, so I used a scrap from the same DCWV paper and used a focal piece I had made for a previous card, but ended up not using.  To finish off the card I added some old chipboard from Colorbok.  I hope you like my little gift ensemble, thanks so much for stopping by!

-Suzanne :O )

Monday, January 28, 2013

Romantic Valentine


Hi everyone!  Today was a fun day because we had an early dismissal at 11am due to the  impending snow.  It turned out to be not that bad, but I was able to get a lot of stuff done that I had been avoiding (cooking, wrapping a gift, etc).  Love unexpected surprises on days like this where you can just enjoy the gift of time!  :)

This year I got into making some vintage-y Valentines.  My style is normally cute and colorful, but I had received many vintage supplies from the swaps I did years ago.  I gathered everything together and set out to make a few cards outside of my normal style and actually liked the results!

I centered this card around the sticker quote (which has been in my stash for years) by Rusty Pickle.  I don't even think that company is still around.  Everything else is from my swap stash, except for the red flowers, which are by Recollections.  I love the more-is-more look to this card.. I just kept piling embellishments on and it was great to use up a ton of supplies on one card!  :D

I hope you all like it, thanks so much for stopping by!

-Suzanne :O )
PS-  I'll be back tomorrow to share the gift packaging I worked on today.  ;)

Sunday, January 27, 2013

Money Holder


Hi there!  The pictures above are of a money holder I made last summer for my boyfriend's brother.  There was a last-minute scramble to come up with a gift, so I told my boyfriend he could just give cash and I would make it look pretty.  :)  Because we were in a rush, I don't think this is my best work, but I still wanted to share the idea.  

I started off with a bunch of supplies by Clear and Simple Stamps and some papers by K & Co.  The tri-fold card was made from this die:


As you can see, the die comes with that swirly shape, so I cut out some orange cardstock, stamped the robot from the set below in orange ink, and trimmed it out:


I stapled a scrap of ribbon and stamped a sentiment from the same set on the orange cardstock; the banner sentiment is from this set:


On the inside, I used another scrap of the blue polka dot paper that was used on the banner and stamped the sentiment from a retired set called Celebrate.  I glued the strip of paper down on the sides and bottom so I could stick in the money in on top.  I used a lot of different sets to pull this together, but this could easily be mass-produced or used for gift cards!  I hope you like my project, thanks for stopping by!

-Suzanne :O )


Posted by Picasa

Saturday, January 26, 2013

Sweet 16

 
Hi everyone!  Just a super quick post today- I've been very busy the last few days working on filling an order for 200 (yes, two HUNDRED!) Thanksgiving cards someone ordered through my Etsy shop.  I still have a long way to go, so most of my free time has been devoted to getting those cards made.

Today's card is one I made a while back for my cousin's sweet 16.  I knew I wanted to use this die-cut by K & Co, but it was so large and busy that I had to keep the background small, so I just ran some cardstock through my Cuttlebug and let that be enough.
 

On the inside, I used another die-cut and created my own sentiment with some Paper Smooches alphabet stamps.  Pretty simple, but I really wanted the focus to be on that fun cake!  Hope you like it, thanks so much for stopping by!

-Suzanne :O )
Posted by Picasa

Friday, January 25, 2013

Congratulations (New Principal)


Hi there!  Today's card is a simple one- you can see I didn't even color the image!  I made this for my mom's goddaughter, who became a principal last summer.  I thought it would be cute to use a school-themed image, so I used this one by Stampin' Up! and just stamped it in brown to keep it looking vintage-y.  I think I got the apple paper in a swap, so I'm not sure who manufactured it, but the green hexagons are K & Co.  The sentiment is Clear and Simple Stamps.

I hope you like my creation, thanks so much for stopping by!

-Suzanne :O )
Posted by Picasa

Thursday, January 24, 2013

Hang in There!


Hi everyone!  Unfortunately this is a card with not such a happy background story- a good friend of my brother's just found out her three year old son has leukemia.  She was asking for donations of diapers, gift cards for food, and toys so she could make do while at the hospital.  My mom and I sent a package and I thought it would be nice to send a handmade card as well.  I tried to use lots of bright, happy colors (all papers are from My Mind's Eye Lime Twist collection).  The sticker is another one from my dollar sticker book- I thought this monkey would be good for a boy card.  Everything else was all pinks and purples!  :P  For a finishing touch, I added some old clips by Making Memories.

 I hope you like my card, and if you're the praying kind, please send prayers to Louise and her family.  Christian is supposed to be coming home on Saturday and will continue chemo treatments, but any well wishes sent their way would be much appreciated!  Thanks so much for stopping by!

-Suzanne :O )

Related Posts Plugin for WordPress, Blogger...